Active Reconnaissance
You need to figure out the network topology in your own (as part of this exercise/module).
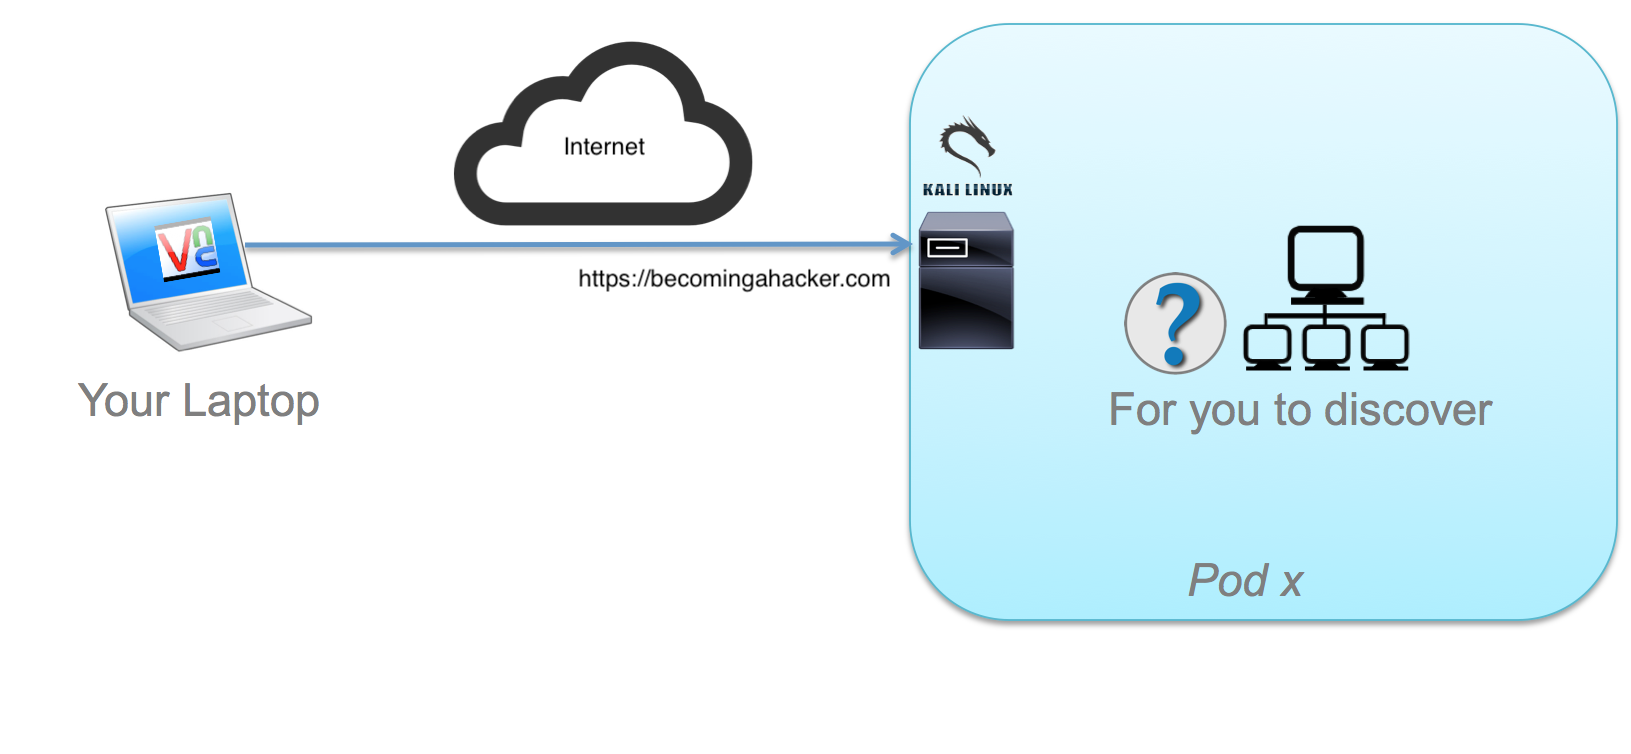
Kali Username: cisco Password: cisco
If you are sharing a pod, remember that there is only 1 graphical (VNC) session per pod, but there are 2 serial console ports you can use to keep your CLI work separate.
Exercise 1: Using NMAP
Open a terminal session in your Kali box and type nmap.
Task 1.1
Determine your IP address and your local network. Use an nmap ping sweep to scan the entire local network and look for any active hosts. Don’t scan any ports.
You can use man nmap or nmap --help to read about the nmap options, or click here for an nmap cheat sheet.
- How many unique hosts are on the network?
Click here for hint...
Task 1.2
Once you find all the active hosts, use nmap to find all the open TCP and UDP ports on those machines. By default, nmap will only scan the most popular ports. Override this and scan all ports.
NOTE: UDP scans take a very long time. Consider deferring UDP scans for later.
Task 1.3
Add Server Version checks (-sV) to gain more information about the services running on each machine you found in Task 1.
Task 2.1
Task 2.2
Run msfconsole. Make sure the database is connected. What
other database backend commands exist? Try help
# msfconsole
...
	=[ metasploit v4.9.2-2014042301 [core:4.9 api:1.0] ]
+ -- --=[ 1301 exploits - 778 auxiliary - 220 post ]
+ -- --=[ 335 payloads - 35 encoders - 8 nops      ]

msf > db_[TAB][TAB]
db_connect        db_export         db_nmap           db_status
db_disconnect     db_import         db_rebuild_cache
msf > db_status
[*] postgresql connected to msf
msf >
Task 2.3
Using db_nmap instead of nmap, run the same commands you ran in
Exercise 1 to load information into the database. This information will
stay persistent for successive modules. You should be able to run
the services command and see the services found by nmap at anytime
without scanning again.
Your results will look something like this (not exactly):
msf > services

Services
========

host         port   proto  name           state  info
----         ----   -----  ----           -----  ----
10.1.1.2  22     tcp    ssh            open   OpenSSH 6.0p1 Debian 4+deb7u1 protocol 2.0
10.1.1.2  3790   tcp    http           open   nginx
10.1.1.2  5800   tcp    vnc-http       open   x11vnc
10.1.1.2  5900   tcp    vnc            open   VNC protocol 3.7
10.1.1.3  21     tcp    ftp            open   vsftpd 2.3.4
10.1.1.3  22     tcp    ssh            open   OpenSSH 4.7p1 Debian 8ubuntu1 protocol 2.0
10.1.1.3  23     tcp    telnet         open   Linux telnetd
10.1.1.3  25     tcp    smtp           open   Postfix smtpd
10.1.1.3  53     tcp    domain         open   ISC BIND 9.4.2
...
Exercise 3: Using Wireshark
Task 3.1
Open Wireshark and listen to the eth0 network interface. What protocols are present?
You may only see BROADCAST traffic but it may be informative. Try some filters:
arpnetbiosripudp.port != 1985- etc..
Exercise 4: DNS Reconnaissance
Task 4.1
Do a zone transfer of the pod.becomingahacker.com domain using the dig.
If the domain you want to query allows DNS zone transfers, you can get those, too. The reality of life on the Internet, however, is that very few domains allow unrestricted transfers these days, and limit zone transfers to secondary name server IPs. You’ll learn how to bypass IP access control lists later in the course.
dig pod.becomingahacker.com NS
dig pod.becomingahacker.com AXFR
Exercise 5: IPv6 Reconnaissance
Task 5.1
Ping a simple IPv6 address destination, 2600::. Use [control]+c to stop the ping. Which company controls this address?
Discover your own IPv4 and IPv6 addresses.
Using whois or rdap, discover which company these IP addresses are registered to in ARIN.
Task 5.2
Send a broadcast ping to the hosts on the local link. Can you find matching MAC addresses for IPv4 addresses?
There’s a corresponding ping for IPv4 as well. This is called a directed broadcast.
Some hosts are missing. Do you understand why? Hint: Look up “smurf attacks.”